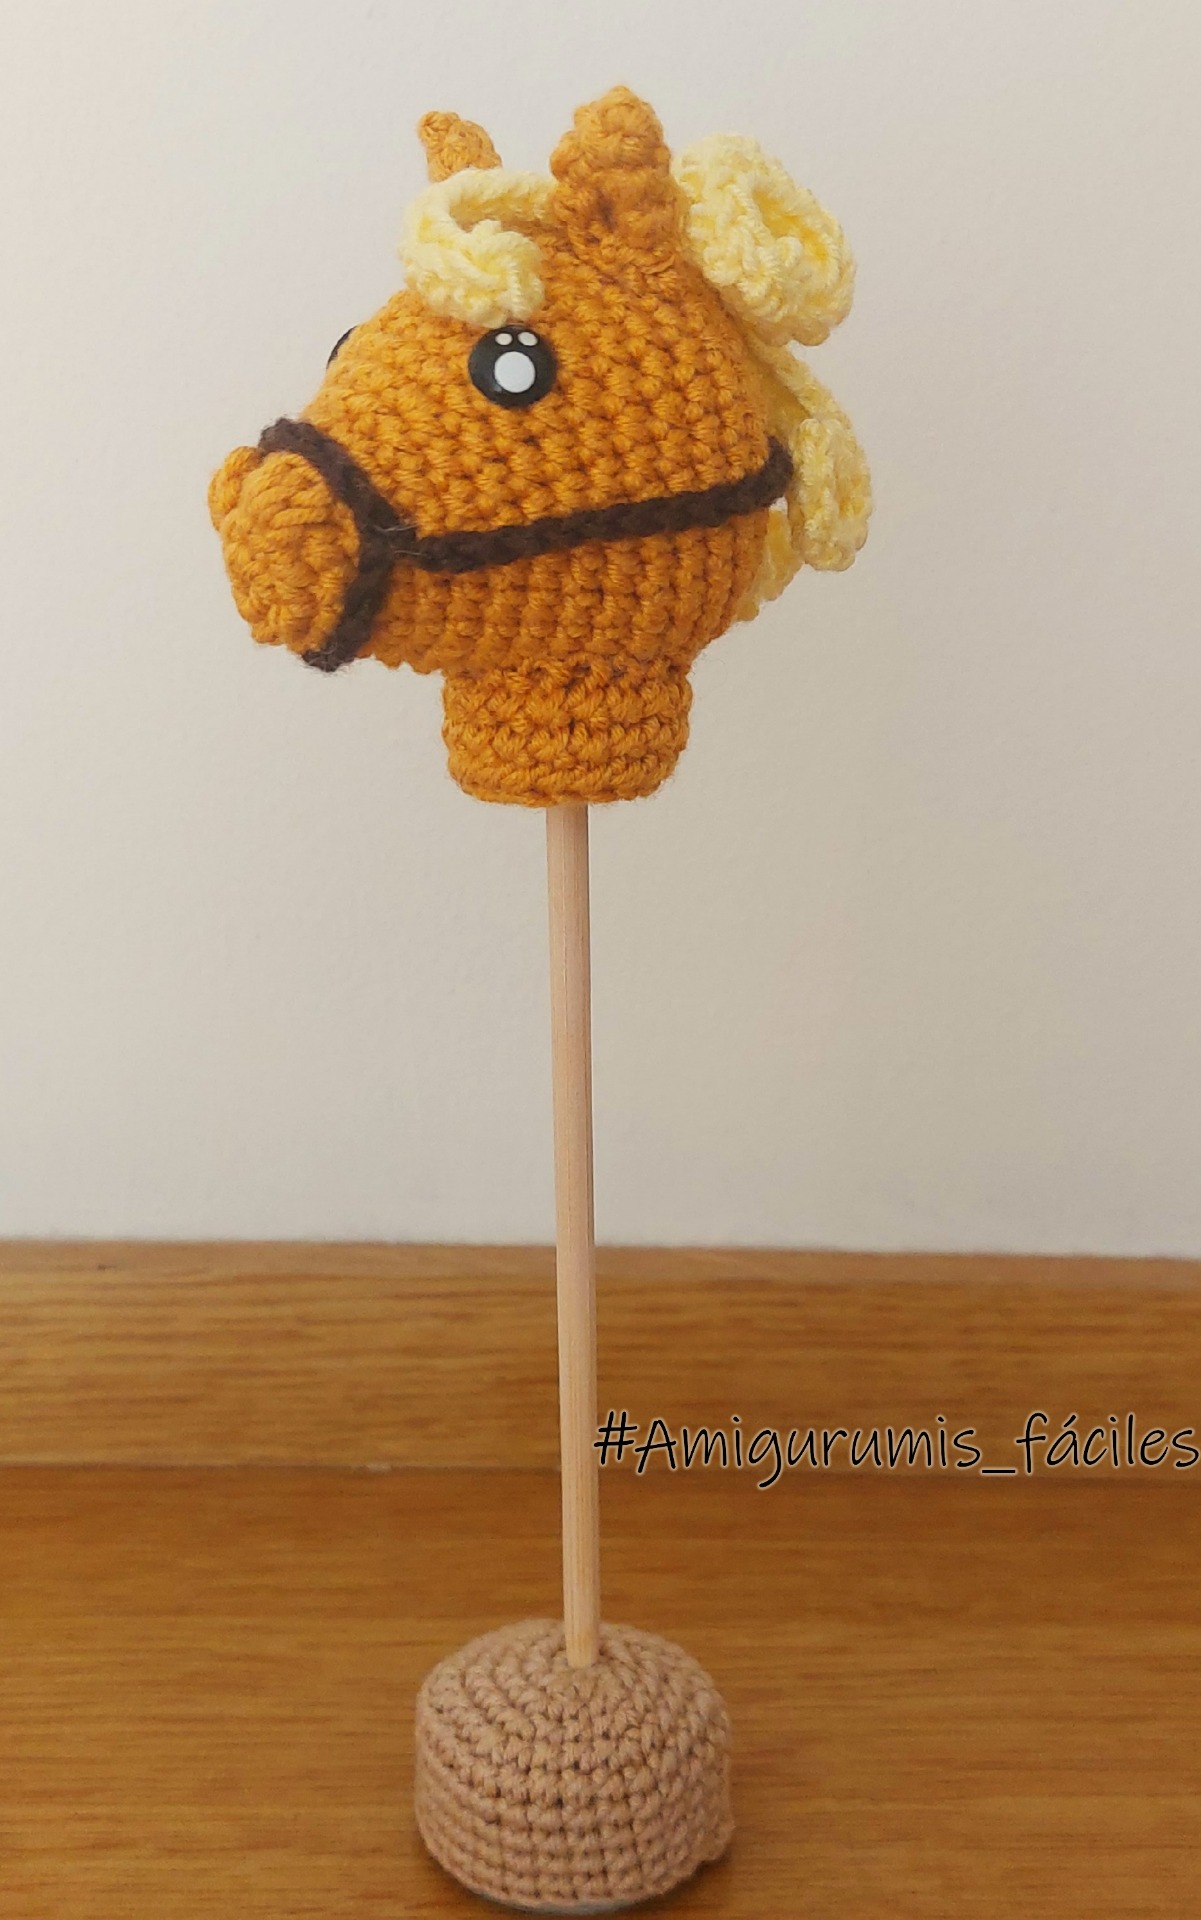
Medidas
- Height: 6,5 cm
- Width : 6 cm
Materials
- 3 mm crochet hook
- Yarn I used: 40% acrylic 60% cotton
- Scissor
- Craft glue or silicone gun (optional)
- Cement for the base (optional)
- Wool needle
- Skewer stick or similar
- 🔨 You can see the materials I use to make my amigurumis here
Stitches used:
- Single crochet (sc)
- Slip stitch (sl st)
- Increase (inc)
- Decrease (dec)
- Chain stitch
- Puff stitch
- half double crochet
Video tutorial
Here you have access to the video tutorial whether you are left-handed or right-handed, below you have the pattern.
You must click on the settings to activate the subtitles.
Pattern
✅ If you want to share this pattern, please pass on the link to this page.
Let's start!
(The number you will see in brackets is the number of points you will have at the end of the rows)
Head
(In this project we are going to work closing the loops)
Row 1: 6 sc in a magic ring. Close the row with a slip stitch and Make chain to gain height.
Row 2: 6 inc (12). Remember to close the round and make a chain stitch to gain height. Do it throughout the project unless otherwise indicated.
Row 3: 4 sc - 3-yarn-over puff stitch - 2 sc - 3-yarn-over puff stitch - 4 sc. (14p).
Row 4: 4 sc - 1 dec - 2 sc - 1 dec - 4 sc (12p).
Row 5: 1 sc - 1 inc x 6 (18p).
Row 6: 18 sc.
Row 7: 2 sc - 1 inc x 6 (24p).
Row 8: 24 sc.
Row 9: 3 sc - 1 inc x6 (30p).
Row 10: 30 sc
Row 11: 4 sc - 1 inc (36p).
Rows 12 to 15: 36 sc on each row.
Row 16: 4 sc - 1 dec x6 (30p)
Row 17: 3 sc - 1 dec x6 (24p)
Row 18: 2 sc - 1 dec x6 (18p)
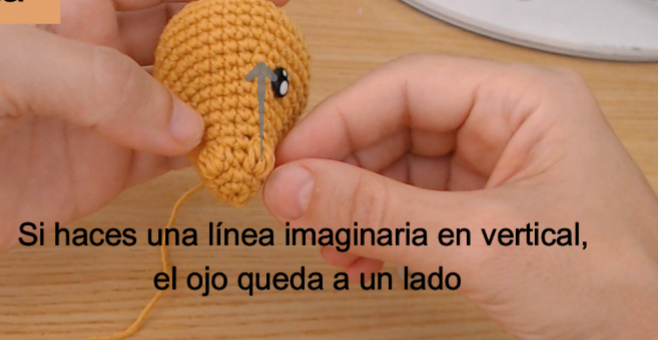
If you're going to use safety eyes, insert them now. If you're going to crochet or embroider them, you can do it at the end. As a reference, make sure they're lined up with the sides of the nose.
Stuff until firm.
Row 19: 1 sc - 1 dec x6 (12p)
Cut the yarn, leaving a long tail for closing. Using a yarn needle, weave through the front loops of the 12 stitches. Pull tight to close the circle and secure with a knot. It's ok if the hole is a bit ope, the hair will cover it.
Pass the needle through the head to cut the excess strand.
Ears
(you can crochet them in a spiral, without closing the rounds)
Row 1: 4 sc in a magic ring.
Row 2: 1 sc - 1 inc x2 (6p)
Row 3: 1 sc - 1 inc x3 (9p)
Row 4: 2 sc - 1 inc x3 (12p)
After finishing, make a slip stitch in the next stitch and cut enough thread to sew.
Bring the edges of the base together and sew them with a yarn needle working in the front loops only. In case of any doubts, as you already know, you have the link at the top to access the video tutorial.
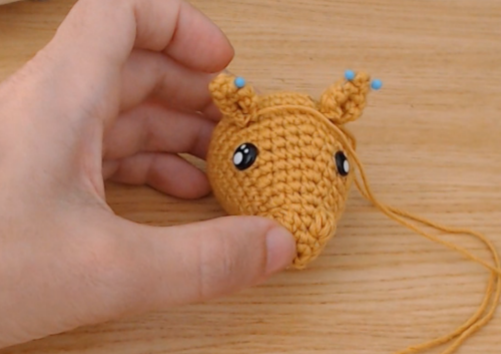
When finished, fold the ear in half and sew the ends together to keep it folded.
🧵 I recommend that you secure them before you start sewing to make sure they're centered. As a reference, place them in line with the eyes. When you finish sewing, secure with a knot and pass the needle through the head to hide the yarn ends before cutting.
Reins
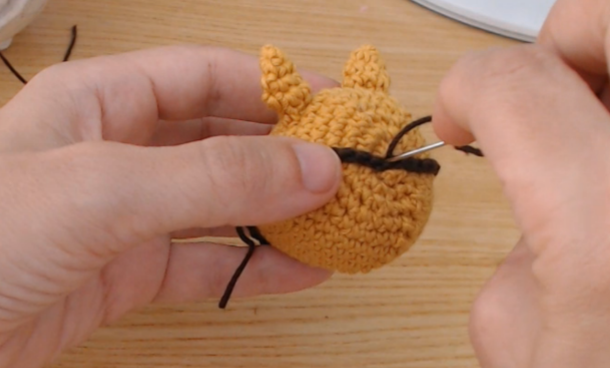
For the reins, I made a chain stitch long enough to go around the nose.
When you have the length, make a slip stitch in the starting chain to form a circle. Without cutting the yarn, continue chaining until it goes around the back of the horse's head. When you have the right length, sew it in place with a few stitches over the circle you made at the beginning.
Make sure both sides are sewn at the same height. As a reference, use the nose – both sides should sit just below it.
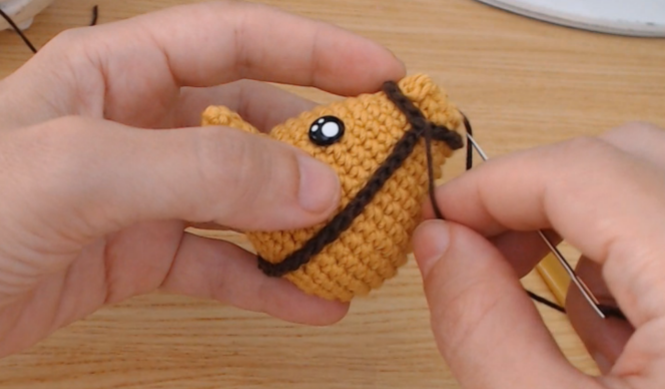
I also secure the back part with a few stitches.
Hair
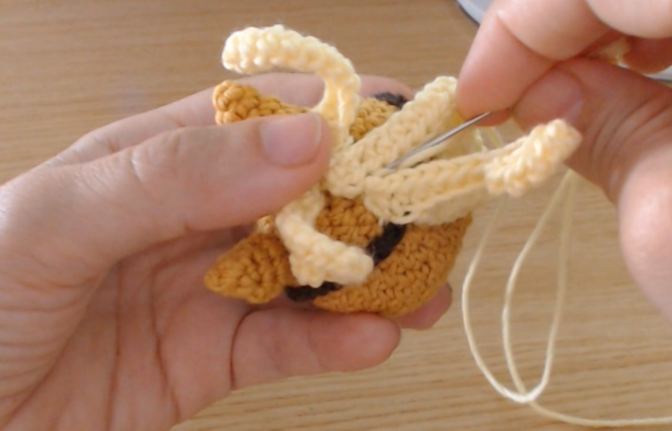
For the hair, I made chains as long as I wanted. For the fringe, I made chains of 10 stitches. For the rest of the hair, I used chains of 18 to 20 stitches, or whatever length you prefer.
If you want the strands to be wider, you can crochet single crochets or half double crochets in the second row. The horse shown in the pictures has half double crochets.
🧵 Leave a long tail on the fringe strand so you can use the same yarn to sew on the rest of the strands. For the rest of the hair, cut the starting and ending tails before sewing them to the head, as you'll use the fringe strand to attach all the pieces.
Sew the strands down the center of the head, going downward until about halfway (at the level of the headstall).
Neck
Row 1: 6 sc in a magic ring. Do not close the ring completely, as you'll need to insert the stick. Crochet by joining the rounds as you did with the head.
Row 2: 6 inc (12p)
Row 3: 1 sc - 1 inc x6 (18)
Rows 4 to 6: 18 sc
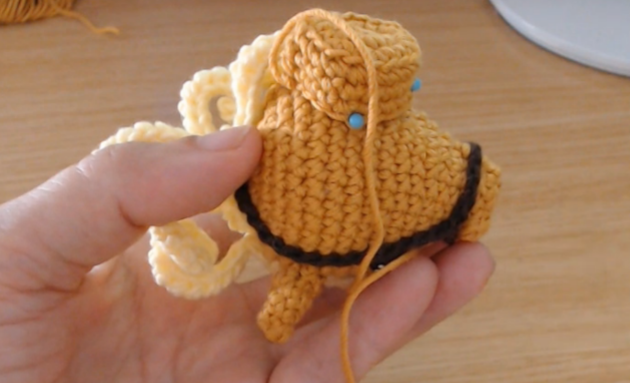
🧵 Cut the yarn, leaving a tail to sew it to the head. Pin the base in place before sewing to ensure it's centered. The bulge from closing the rounds should be positioned at the back.
When there's about one centimeter left to close, stuff a little—just enough to prevent the sides from sinking inward. Finish sewing, secure with a knot, and weave the needle through the neck before trimming the excess yarn.
Stick
I used a round-tipped chopstick, but a skewer stick would work as well.
Pass the needle through the neck via the magic ring and also through the head. If you're using it as decoration, the stick will be held firmly enough. If it will be handled frequently, you can secure the stick with instant glue or silicone by adding a bit right at the magic ring.
Base
For my horses, I made a base with gray cement. I bought cement at a craft store and mixed a small amount with water until it formed a paste similar to toothpaste—not too thick or too runny.
I put this paste in a clean, empty yogurt container, and placed a piece in the center so that it already had a hole. It's the typical piece used to make bracelets and necklaces. I would say it's also possible to place the stick directly into the fresh cement to create the hole, but since I had this piece, I used it instead.
Once the cement is dry, you can easily remove the plastic yogurt container. Then, we just need to crochet the cover, working rounds with increases until reaching the circumference width, and then rounds of single crochet to crochet the length.
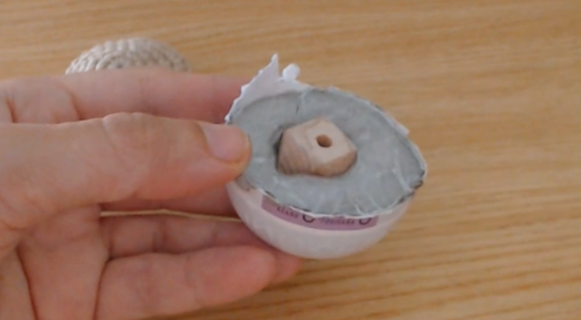
There are also other options so our horses don't stay permanently horizontal when we're not holding them, such as these wooden sticks that already come with a pre-made hole.
If you enjoy my content and would like to support me, you can invite me for a coffee. Your contribution is greatly appreciated and helps me continue creating 🤗☕
