Video tutorial and pattern
Pulsa AQUÍ para ir a la versión en español
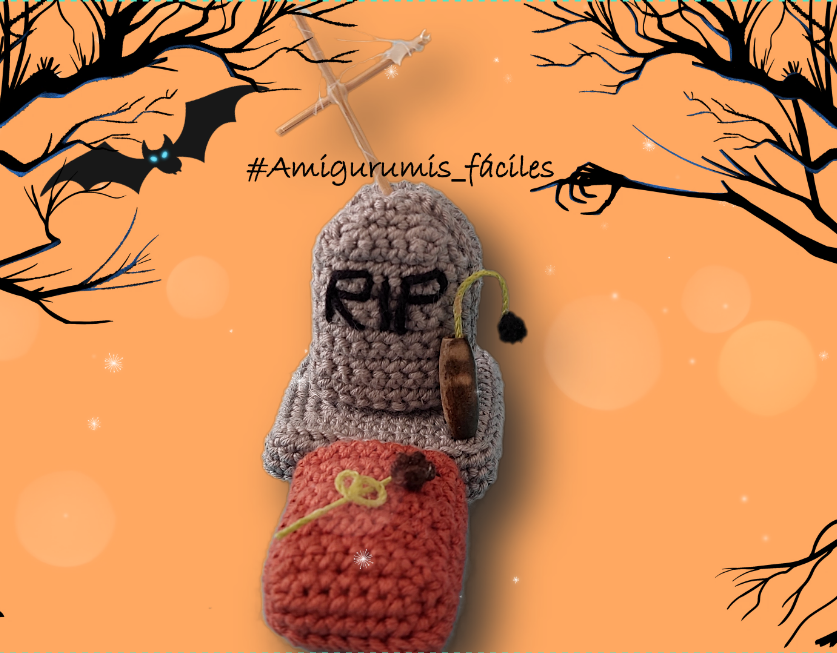
Medidas
- Length : 10 cm
- Heigth:8 cm
- Width: 6 cm
Materials
- 3 mm crochet hook
- Yarn I used: 40% acrylic 60% cotton
- Scissors
- Wool needle
- Silicon gun
- White craft glue
- Cardboard (optional)
- 🔨 You can see the materials I use to make my amigurumis HERE
Stitches used are:
- Single crochet (sc)
- Slip stitch (sl st)
- Decrease (sc3tog)
- Increase (inc)
- Magic ring
Video tutorial
Here you have access to the video tutorial whether you are left-handed or right-handed, below you have the pattern.
You must click on the settings to activate the subtitles.
Pattern
✅ If you want to share this pattern, please, please pass on the link to this page.
Let's start!
Tombstone base
(In this project we are going to work closing the loops)
Row 1: 4 sc in a magic ring.
Row 2: 3 sc in the same stitch in the next 4 stitches (12p)
Row 3: 1 sc - and repeat the following sequence in parenthesis 3 times (1 inc of 3 sc + 2 sc), at the end make 1 inc of 3 sc + 1 sc. (20p)
Row 4: 2 sc and repeat the following sequence in parenthesis 3 times (1 inc of 3 sc + 4 sc), at the end make 1 inc of 3 sc + 2 sc. (28p)
Row 5: 3 sc and repeat the following sequence in parenthesis 3 times (1 inc of 3 sc + 6 sc), at the end make 1 inc of 3 sc + 3 sc. (36p)
Row 6: 4 sc and repeat the following sequence in parenthesis 3 times (1 inc of 3 sc + 8 sc), at the end make 1 inc of 3 sc + 4 sc. (44p)
Row 7: 5 sc and repeat the following sequence in parenthesis 3 times (1 inc of 3 sc + 10 sc), at the end make 1 inc of 3 sc + 5 sc. (52p)
Row 8: Work in the back loops of the stitches and make 52 sc.
Rows 9 and 10: Work through both loops and make 52 sc on each row.
Row 11: Work in the back loops of the stitches. 5 sc and repeat the following sequence 3 times [1 sc3tog + 10 sc], at the end make 1 sc3tog in the last corner and 5 sc.
Row 12: Work through both loops. Make 4 sc (to decrease the corners work throug both loops too) and repeat the following sequence in parenthesis 3 times (1 sc3tog + 8 sc), at the end make 1 sc3tog and 4 sc.
Row 13: Make 3 sc and the following sequence in parenthesis 3 times (1 sc3tog + 6 sc), at the end make 1 sc3tog and 3 sc.
To prevent the base from bulging when filling, place a small piece of cardboard.
Row 14: Make 2 sc and the following sequence in parenthesis 3 times (1 sc3tog + 4 sc), at the end make 1 sc3tog and 2 sc.
Row 15: Make 1 sc and repeat the following sequence in parenthesis 3 times (1 sc3tog + 2 sc), at the end make 1 sc3tog and 1 sc.
Stuff before continuing with small pieces. Push the stuffing towards the edges and corners and don't fill too much.
Row 16: Make 1 sc3tog x 4 times.
Secure with 1 knot and pass the needle through the tombstone to cut the excess thread.
Tombstone
Row 1: Chain of 9 stitches.
Row 2: Start in the 2nd stitch (the one next to your hook) and make 8 sc, make a chain and turn to crochet on the back side.
Row 3 to 11: Starting in the 1st stitch, make 8 sc on each row. As in row 2, make a turning chain on each row.
Row 12: Make 1 dec by going through both loops - 4 sc - 1 dec by going through both loops. Chain to turn.
Row 13: Make 1 dec by going through both loops - 2 sc - 1 dec by going through both loops. Don't make a chain.
Row 14: Without turning, make 34 sc around the edge.
Row 15: 34 sc. At the end, make a slip stitch in the next stitch, cut the yarn, and pull the tail to the back. Secure with a knot, leaving it slightly away from the edge.
Crochet another piece the same way, leaving a long enough tail to sew both halves together.
Sew the tombstone
We
will use wool needle. Join both halves making sure the corners match. The knot
should be on the inside. From the side facing you, insert the hook into the
front loop of the stitch and go through the back loop of the stitch on the
piece behind.
Stuff before closing. If you want the front to be straighter, insert a small
piece of cardboard.
At the end, you can attach the tombstone to the base using a hot glue gun.
Soil (bottom part)
Row 1: Chain of 9 stitches.
Row 2: Start in the 2nd stitch (the one next to your hook) and make 8 sc, make a chain and turn to crochet on the back side.
Rows 3 to 12: Starting in the 1st stitch, make 8 sc on each row. As in row 2, make a turning chain on each row.
Row 13: Crochet the edge with singles crochet just like you did with the tombstone. In total you will have 36 stitches. Make a slip stitch in the next stitch, cut the yarn, and pull the loop to draw out the tail. Pass the yarn to the back and secure with one knot.
Soil (upper part)
Row 1: Chain of 9 stitches.
Row 2: Start in the 2nd stitch (the one next to your hook) and make 8 sc, make a chain and turn to crochet on the back side.
Rows 3 to 12: Starting in the 1st stitch make 8 sc on each row. As in row 2, make a turning chain on each row.
Row 13: Crochet the edge with singles crochet.
Row 14: Work single crochets all the way around.
Cut enough yarn to sew both halves. Just like with the tombstone, insert the needle through the front of the first face stitch
and pass it through the back of the stitch on the back piece. You can also place a piece of cardboard so the bottom doesn't bulge when stuffing.
Stuff when there's just a little left to close, secure with a knot, and pass the needle through the tombstone to cut the remaining yarn.
Letters
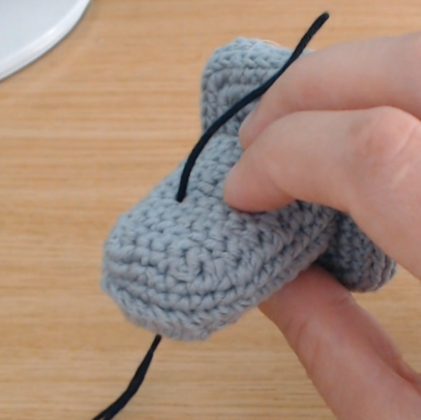
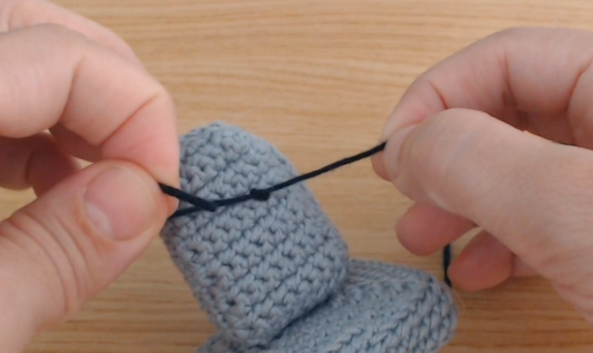
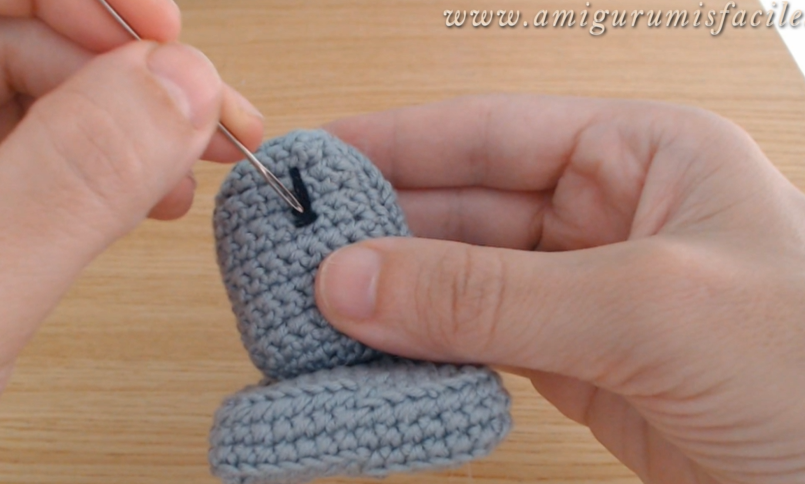
Take a piece of black yarn for the letters, pass it through the side or back, and leave about 4 finger-widths of yarn hanging. Insert the needle to shape each letter, and when you're done, pull it out through the same stitch where you first inserted it. Make a couple of knots together with the starting tail, cut the ends close to the knot, and tuck it inside using the needle.
Now you can attach the soil with a hot glue gun and use a skewer to make the cross.
To create the spiderweb effect on the cross, let the hot glue gun cool slightly, and when the glue starts to thicken, place a drop on top of the cross and let it flow down to one side. The glue will stretch and form a thin thread, creating a spiderweb effect.
"Big" flower.
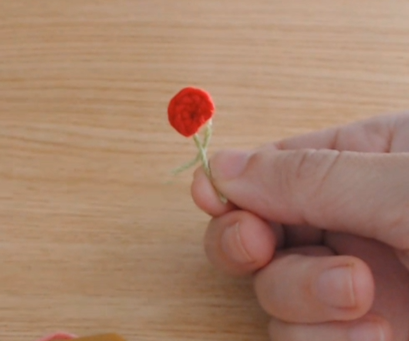
When the stem you glued is dry, attach it to the flower. The stick should go through at least half of the flower. To glue them, I have used white craft glue.
Take
a piece of cardboard to protect the surface and cut some pieces of yarn to make
the stem.
Soak the threads completely with white craft glue. When it dries, the yarn will
become stiff and hold the shape you gave it. Let it dry if you can all day.
6 sc in a magic ring and a slip stitch in the next stitch. Cut thread and pull on the loop to pull out the tail With a yarn needle, take the yarn to the back and secure it with a knot, making sure it's not right on the edge
When the stem you glued is dry, attach it to the flower. The stem yarn should cover at least half of the flower. Make sure to place it on the side where you made the knot to hide it. To glue them, I have used white craft glue.
"Small" flower (the one that appears in the photo)
Take a piece of yarn that isn't too long. Start making knots in the center of the yarn, one on top of the other. There's no need to tighten them too much. Tie as many knots as you like to make the flower bigger or smaller. Once you have the size you want, thread the yarn needle with both ends and pass it through the first knot you made. This way it will take a round shape. You can go through more knots to make it rounder, or simply secure with a knot and cut the remaining ends.
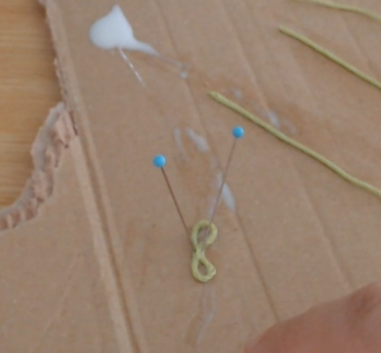
If you want the stems not to be straight, or to add small leaves, you can shape them with the help of pins and let them dry.
All done! I hope you've got a spooky tombstone ready for Halloween 😊.
If you enjoy my content and would like to support me, you can invite me for a coffee. Your contribution is greatly appreciated and helps me continue creating 🤗☕